Quick Start
Get up and running with 7CG in minutes.
Installation
- Download 7CG from the official website
- Install the application for your platform (Windows, macOS, or Linux)
- Launch 7CG
First Run Wizard
When you first launch 7CG, a setup wizard will guide you through initial configuration.
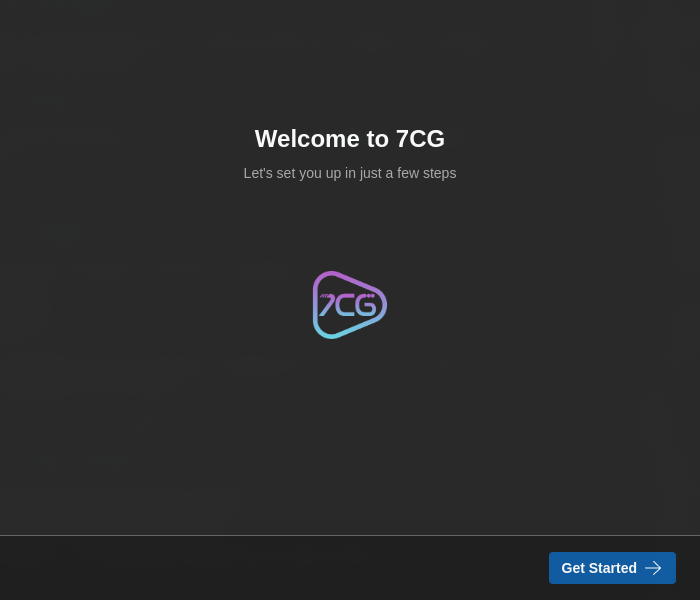
1. Welcome
The wizard welcomes you to 7CG. Click Get Started to begin setup.
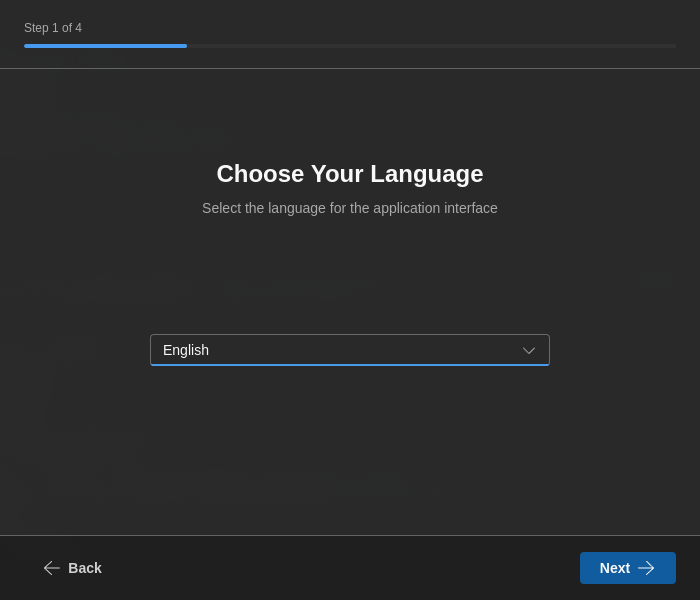
2. Language Selection
Choose your preferred interface language:
- English
- Português
- Español
Your selection is applied immediately and is used to pre-filter the default Bible translation list later in the wizard.
3. CasparCG Connection
Configure the CasparCG server connection used by 7CG:
- Server IP / Hostname - For example
127.0.0.1,localhost, or the hostname of your CasparCG machine - Server Port - AMCP port, normally
5250 - Test Connection - Verifies the server is reachable before continuing
If you are not ready to connect yet, you can skip this step and configure it later in Preferences → Connection.
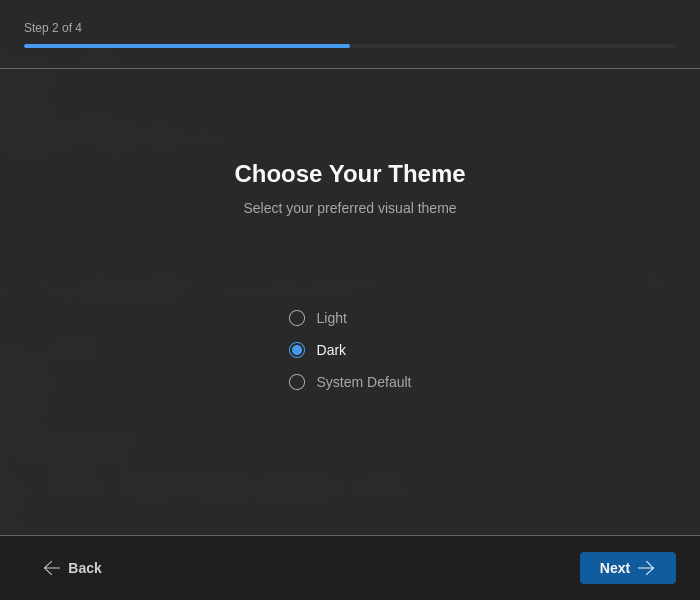
4. Theme Selection
Select your preferred visual theme:
- Light - Light color scheme
- Dark - Dark color scheme
- System - Follows your operating system theme
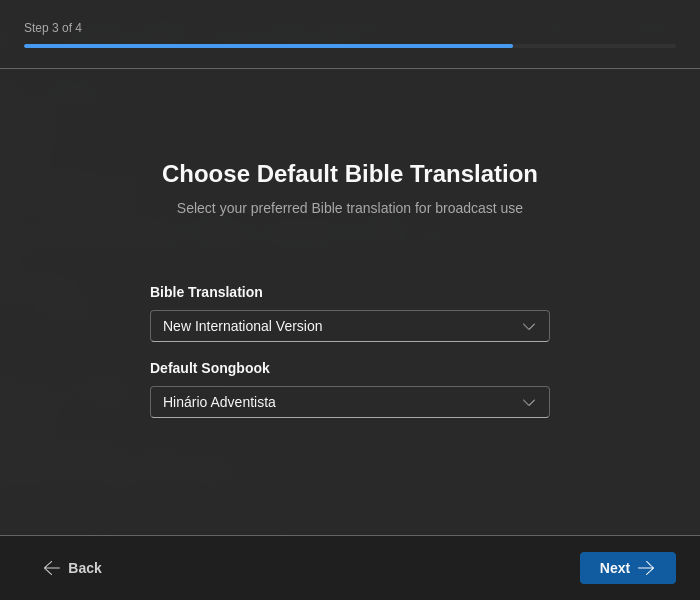
5. Bible & Songbook
Configure your default content sources:
- Bible Translation - Select your preferred Bible version (filtered by your chosen language)
- Songbook - Choose your default songbook for lyrics
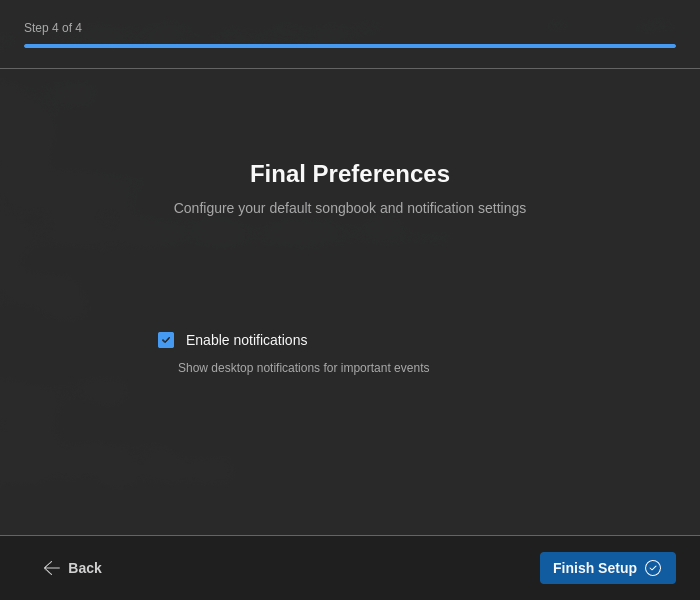
6. Other Preferences
The final wizard step captures a few operational defaults:
- Notifications - Enable desktop notifications for updates, imports, and important status messages
- Auto-play channel bug on startup - Starts your bug overlay automatically when 7CG launches
- Auto-play channel ID on startup - Starts your channel ID overlay automatically when 7CG launches
Those startup overlays are configured in detail later in Preferences → Channel Graphics.
After the Wizard
When setup finishes, 7CG opens the main application and you can refine your preferences from the settings panel:
- Connection - CasparCG host, AMCP port, OSC port
- Channels - Discover and label CasparCG channels
- Interface - Theme, language, and module visibility
- Companion - Enable the server and pair devices with a PIN
- Channel Graphics - Configure bug and ID overlays, channel/layer targets, and autoplay
- TV Manager - Cloud rundown integration
Connecting to CasparCG Later
If you skipped connection testing during the wizard:
- Open Preferences
- Navigate to Connection
- Enter your CasparCG server details:
- Host address, such as
localhostor192.168.1.100 - Port, normally
5250
- Host address, such as
- Click Connect
- Open Channels to confirm 7CG can discover and label the server channels correctly
See the Connection Configuration guide for detailed setup instructions.
Optional Next Setup Tasks
Before your first live production, it is worth checking three areas:
- Channel Graphics to configure startup bug and ID overlays
- Companion Integration to pair Stream Deck or Companion devices
- Layouts to tailor the workspace for each operator or production type
Creating Your First Rundown
Once connected to CasparCG:
- Open or create a rundown in the Rundown module
- Add blocks from the modules or from the rundown creation actions
- Configure content and routing settings
- Select an item and press Play to execute it
- Use Stop when the block type supports stopping or clearing on-air output
For more details, see the Rundown Module and Configuration sections.
Next Steps
- Explore configuration options to customize your workflow
- Learn about available modules for different content types
- Check troubleshooting if you encounter issues